Cabinet Cleaner and Restorer: How to Clean
Kitchen cabinets take a daily beating. Grease drifts up from the stove, fingers leave dull smudges, and the finish can start to look tired. The good news is that most cabinets don't need to be replaced to look better.
With the right Cabinet Cleaner and Restorer, you can remove buildup, bring back shine, and stop small issues from turning into expensive ones. In many homes, a careful clean and light restore is faster and cheaper than new doors or a full remodel, which fits the restore-not-replace approach from Dr. Cabinet.
This guide keeps it simple: match the cleaner to your cabinet finish, use gentle tools, and follow a routine you can finish in one afternoon.
Pick the right cabinet cleaner and restorer for your cabinet finish (wood, painted, laminate)
Cabinets aren't all the same, even if they look similar. One door might be solid wood with a clear topcoat. Another could be painted MDF. A third might be laminate or thermofoil over particleboard. Because of that, the "best" cleaner depends on what you're wiping.
Using the wrong product can do real damage. Harsh chemicals can soften paint, cloud lacquer, or strip the protective topcoat on wood. Abrasive powders can leave tiny scratches that catch grease later, so cabinets look dirty again faster.
A smart rule: start mild, then step up only if you need to. A dependable Cabinet Cleaner and Restorer should lift oils and fingerprints without leaving a sticky film. If you're unsure what finish you have, treat it as delicate until you confirm it. That cautious mindset is also how Dr. Cabinet approaches restorations, because preserving the existing finish often saves time and money.
Wood cabinets: clean without soaking, then condition for a healthy shine

Wood looks warm and rich, but it hates excess water. Too much moisture can swell fibers, lift edges, or leave cloudy spots in the finish. Instead, aim for "barely damp," then dry right away.
For everyday cleanup, mix a drop or two of mild dish soap into warm water. Wipe with a microfiber cloth, then follow with a dry towel. For heavier grime, Murphy's Oil Soap can work well on wood when you dilute it and don't overuse it. After cleaning, buff the surface dry to bring back a soft glow.
Avoid common troublemakers on wood: heavy vinegar use (especially straight vinegar), steam cleaners, abrasive pads, bleach, and ammonia. Those can dull the finish or break it down over time.
Painted, lacquered, and laminate cabinets: what works, and what can ruin the finish
Painted and lacquered cabinets can look smooth and modern, yet they scratch and dull easily. Stick to pH-neutral soap and water, applied with a soft cloth. Skip acidic sprays and rough scrubbing, because they can leave a faded, chalky look.
Laminate and thermofoil are usually more stain-resistant, so a slightly stronger degreaser can be okay. Still, keep water out of seams and edges, where swelling starts. If you need a careful "spot help" on laminate only, Bar Keepers Friend Soft Cleanser can be used lightly with a gentle touch. Don't use it on wood, paint, or lacquer.
One small tip that makes a big difference: clean handles and knobs separately. Remove them if you can, wash with warm soapy water, and dry well before reinstalling.
Before you move on, remember this: the right Cabinet Cleaner and Restorer is the one that respects your cabinet's finish, not the one that smells the strongest.
A simple clean-and-restore routine that makes cabinets look new again
If your cabinets look dingy, you don't need a complicated process. You need a repeatable routine that removes grease, clears residue, and restores a natural sheen. Plan on working top to bottom, and don't rush drying, because moisture causes many cabinet problems.
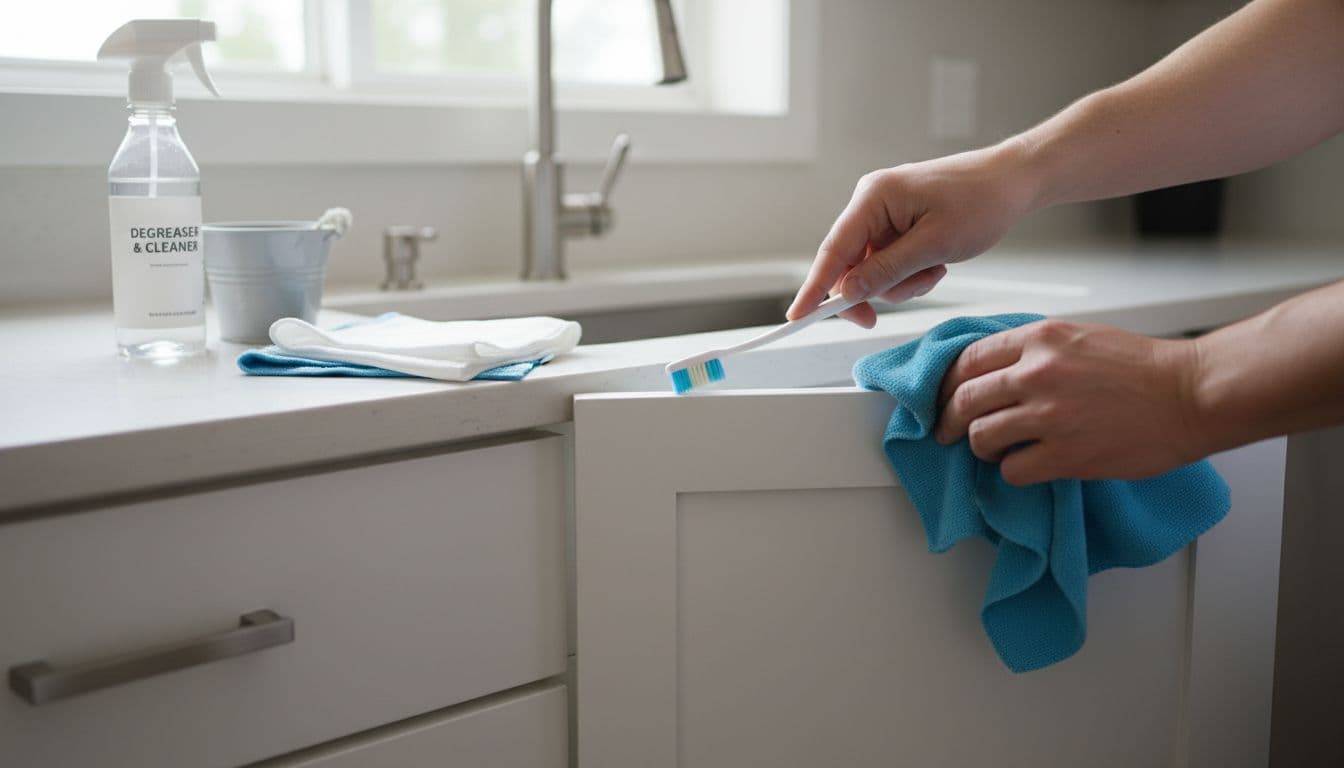
The biggest mistake is spraying product right onto doors. Instead, spray your cloth, wipe a small section, then dry it. That single habit helps any Cabinet Cleaner and Restorer perform better, since it reduces drips into joints and hinges. Dr. Cabinet techs use the same principle when they refresh cabinets on site, control the moisture and control the outcome.
Test your cleaner in a hidden spot first. If it feels tacky after drying, it's leaving residue.
Quick checklist before you start (so you do not cause damage)
A few minutes of prep keeps you from rubbing grit into the finish.
- Identify the finish: wood, painted, lacquered, laminate, or thermofoil.
- Hit grease first: focus near the stove and around pulls.
- Dust the tops: grime up there falls down later.
- Protect counters: lay down a towel near sinks and soap areas.
- Use microfiber cloths: they grab grease without scratching.
- Keep cloths barely damp: no dripping, no soaking.
- Test a hidden spot: inside an upper door or behind a hinge.
If you're using stronger cleaners, open a window and wear gloves.
The 5-step method: dust, degrease, detail, rinse, then restore the shine
Work in small sections, about one door at a time. That keeps cleaner from drying on the surface.
- Dust first: Use a dry microfiber cloth, especially on frames and edges.
- Degrease gently: Spray your cloth (not the cabinet) with your chosen cleaner, then wipe with the grain or in smooth strokes.
- Detail the cracks: Use a soft toothbrush for corners, trim, and around hardware.
- Rinse off residue: Wipe with a clean cloth that's barely damp with plain water.
- Dry and buff: Use a fresh towel to dry completely, then buff for an even finish.
For restoring shine on wood, add a light conditioner or a beeswax-based polish about once a month. If you prefer a DIY option, a tiny amount of lemon juice and olive oil can work on wood, as long as you apply it lightly and buff fully dry. On painted or laminate doors, skip oils and waxes that can build up and attract dust.
When cleaners are not enough: signs you need touch-ups, hinge fixes, or refinishing
Some problems won't wipe away, no matter how careful you are. Watch for peeling or bubbling finish, deep scratches that feel rough, or swollen areas near the sink. Worn edges, sticky drawers, and doors that won't close often point to hinge issues or alignment problems, not dirt.
If you see dark water stains, soft spots, or cracked thermofoil at the edges, stop soaking the area and switch to a dry approach fast. At that stage, touch-ups, hinge adjustment, drawer repair, or refinishing may be the better fix. Dr. Cabinet can also help you decide between refinishing and refacing, and you can request a free estimate without guessing what you "should" do.
Conclusion
Clean cabinets don't come from elbow grease alone. They come from matching products to the finish, using soft tools, and keeping water under control. When you choose a Cabinet Cleaner and Restorer that's gentle, wipe in small sections, and buff dry, the results look natural, not greasy or streaky.
For upkeep, do a quick weekly wipe around handles and cooking zones. Then do a deeper clean and light polish once a month (wood only). If you're seeing peeling, swelling, or doors that won't align, Dr. Cabinet can help with repairs or refinishing so your cabinets look right again, without jumping straight to replacement.


Comments
Post a Comment