How to Fix Faded Kitchen Cabinets - Best Guide 2026
Kitchen cabinets can go dull fast. Sunlight, grease, steam, harsh sprays, and plain old wear can leave them yellowed, uneven, or washed out. The good news is that restoring them usually costs far less than tearing them out.
If you're trying to learn how to fix faded kitchen cabinets, start by finding out what actually changed. Some cabinets only need a deep clean. Others need touch-up work, refinishing, or help from a pro. For homeowners who want to restore instead of replace, Dr. Cabinet is a practical option because the fix can be tailored to the cabinet material, finish, and damage.
Figure out why your kitchen cabinets faded before you start
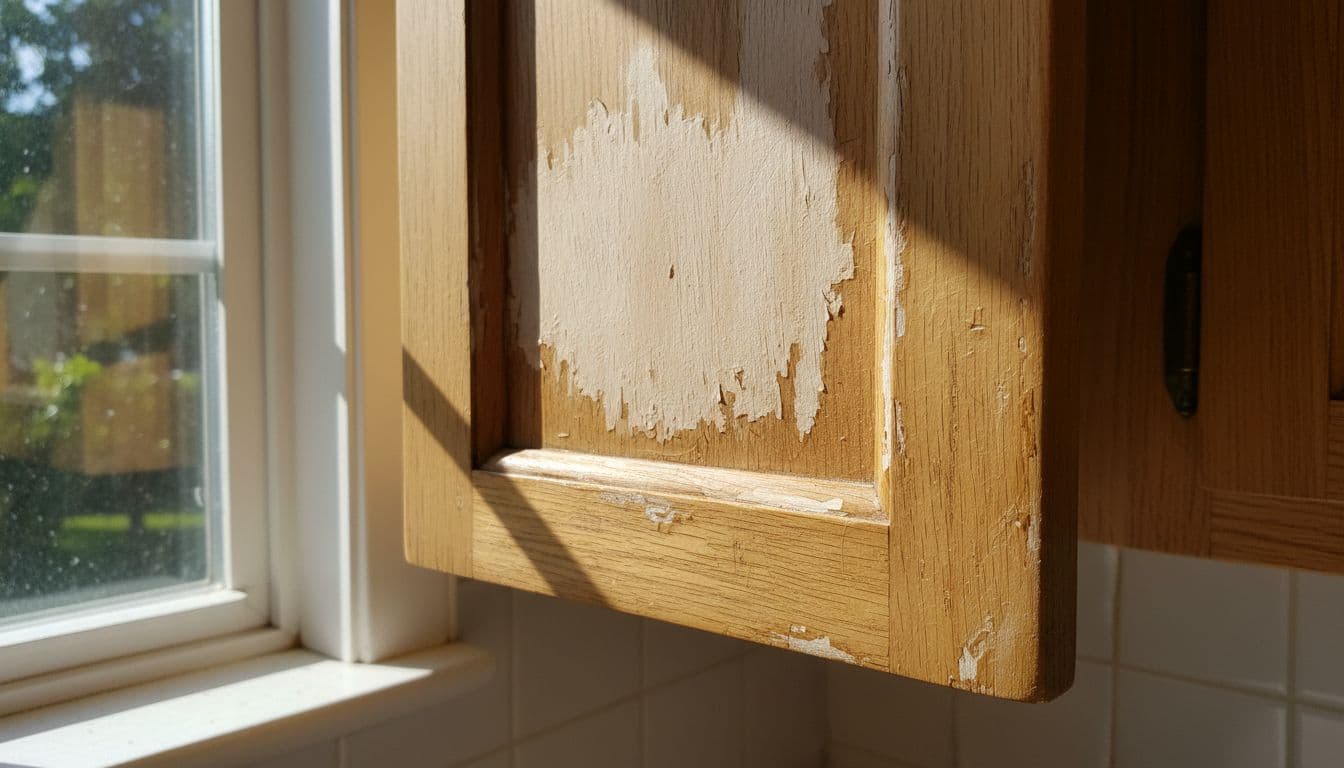
Before you buy paint or stain, look closely at the surface. True fading usually comes from UV light, moisture, and finish breakdown over time. On the other hand, cabinets near the stove often just wear a coat of sticky grime that blocks their real color.
That difference matters. Dirt sits on top of the finish. Fading changes the finish itself. If you skip this step, you can waste time sanding cabinets that only needed cleaning.
Signs the color is hidden under grease, not gone for good
Grease buildup loves high-touch spots. Check around pulls, above the range, and on upper doors near the cooktop. If the surface feels tacky, looks cloudy, or has a dark film, the finish may still be fine underneath.
Start with a strong kitchen-safe degreaser, such as a TSP substitute or a product made for grease removal. Wipe, rinse, and dry well. Many cabinets look brighter after one serious cleaning because the dullness was sitting on top, not baked into the wood.
Clean first, judge second. A dirty finish can mimic fading.
Signs the finish is damaged and needs more than cleaning
True finish damage is easier to spot once the grime is gone. Look for pale spots near windows, worn corners, peeling clear coat, and color that changes from one door to the next. Those signs point to UV damage, worn stain, or broken topcoat.
Touch-ups won't always blend well in these cases. If one area is sun-bleached and the rest is amber, a marker may stand out more than it helps. That larger mismatch usually means refinishing part, or all, of the cabinet set is the better path.
How to fix faded kitchen cabinets, step by step
For many homes, how to fix faded kitchen cabinets comes down to careful prep and thin, even finish coats. Rushing is what causes drips, peeling, and patchy color later.
- Remove doors and hardware. Label every hinge, door, and drawer front so reassembly stays simple.
- Deep clean everything. Use a degreaser, especially near the stove and handles. Then let the surfaces dry fully.
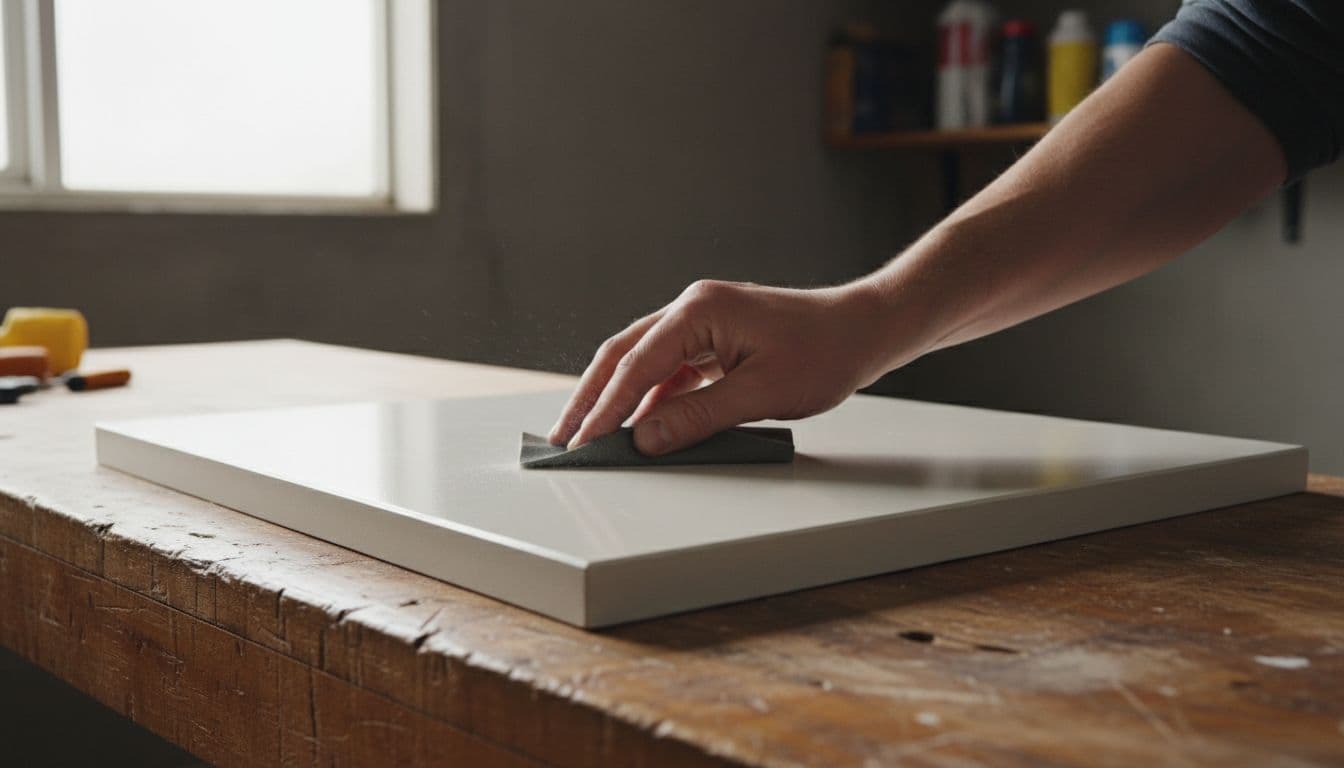
- Scuff sand lightly. Use about 180-grit to dull the old sheen and help the new finish stick.
- Repair small chips. Fill dents or edge nicks, then sand smooth once dry.
- Prime if you're painting. In 2026, bonding primers are a popular choice because they grip glossy or stained cabinets well. Zinsser BIN and Bulls Eye are common picks.
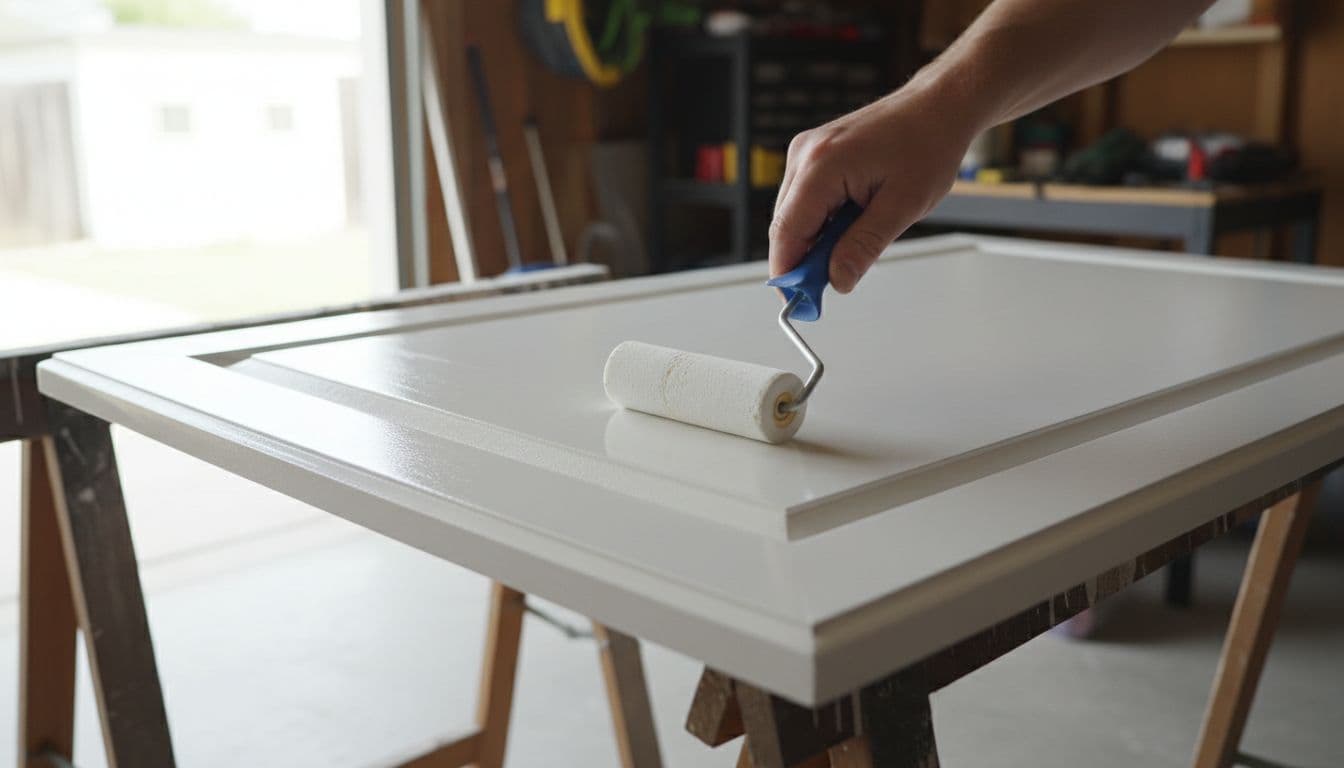
- Apply stain or paint in thin coats. If you're painting, urethane enamel finishes remain a go-to in 2026 because they hold up well in busy kitchens. Sherwin-Williams Emerald Urethane is widely used for this reason.
- Let each coat dry, then sand lightly if needed. That helps the next coat lay smoother.
- Add a durable topcoat when the finish calls for it. This matters most for stained cabinets or touch-up work that needs extra protection.
The best fix for lightly faded cabinets
When the finish is still sound, keep the repair simple. A deep clean, stain marker, touch-up pen, or color-restoring product can hide small faded spots well. Then a fresh protective coat can bring back a more even sheen.
That's often the cheapest answer to how to fix faded kitchen cabinets. It works best for mild dullness, small sun-faded areas, or edge wear on otherwise solid cabinets.
When refinishing is the right move
If fading is widespread, or the clear coat is peeling, refinishing gives you a fresh start. The usual path is simple: clean, sand, prime if needed, paint or restain, then let the finish cure before heavy use. Oak cabinets may also need grain filler if you want a smoother painted look.
A full refinish takes more time, but it solves uneven color better than spot fixes. That is where Dr. Cabinet often saves homeowners money, because the right repair can restore the cabinets without pushing a full replacement.
Know when DIY makes sense and when to call a cabinet pro
DIY can work well, but not every kitchen is a good weekend project. Dr. Cabinet helps many homeowners sort out whether they need a touch-up, a refinish, or a more targeted repair.
Here's the quick trade-off:
| Option | Best for | Main upside | Main drawback |
|---|---|---|---|
| DIY touch-up | Small faded spots | Lower cost | Hard to blend color |
| DIY refinish | Small to mid-size kitchens | More control | Time, mess, learning curve |
| Pro repair | Damaged finish or veneer | Better color match | Higher upfront cost |
| Pro refinishing | Large kitchens | Smoother, longer-lasting result | More scheduling |
In short, DIY saves money up front, while pro work often saves time and frustration.
DIY is a good fit for small repairs and solid cabinet boxes
If the cabinet boxes are solid and the damage is light, a DIY fix can make sense. Materials are usually reasonable, but patience matters more than price. Most problems come from poor prep, skipped sanding, or thick coats that look fine at first and peel later.
Dr. Cabinet often sees cabinets that failed because the cleaning step was rushed. Good prep does most of the heavy lifting.
Professional help pays off when the finish is badly faded
Large kitchens, veneer doors, peeling finishes, and hard color matches are tougher jobs. A pro can prep faster, spray smoother coats, and choose products that fit the cabinet material. That usually means better durability and less disruption in the home.
When the damage is more than surface-deep, Dr. Cabinet can match the fix to the cabinet instead of pushing a full remodel.
How to keep restored cabinets from fading again
Once you learn how to fix faded kitchen cabinets, the next goal is keeping them that way. Clean with a microfiber cloth and mild soap, not abrasive pads or harsh chemicals. Wipe grease quickly, especially near the range. Use blinds or window film if one wall gets strong afternoon sun.
Also, give new paint time to cure before scrubbing it. Many cabinet coatings need days, and some need weeks, to fully harden. In 2026, low-sheen and matte finishes are popular because they hide fingerprints and small wear marks better than shinier options.
Restoring dull cabinets doesn't have to mean replacing them. Sometimes the fix is a deep clean. Sometimes it's a touch-up, a new topcoat, or a full refinish. In the end, how to fix faded kitchen cabinets depends on whether you're dealing with grime, sun fade, or finish damage. If you want an expert opinion before you start, Dr. Cabinet can help restore your cabinets and extend their life for years.


Comments
Post a Comment