Refinishing Built In Cabinets Without Losing Their Custom Fit
Your built-ins already fit the room, so replacing them can feel like ripping out part of the house. Refinishing built in cabinets keeps that custom look, costs far less than a full remodel, and can make the whole space feel new again.
That matters when the boxes are solid but the finish looks tired, yellowed, or scratched. Dr. Cabinet helps homeowners update worn, dated, or damaged built-ins without tearing them out. Before you start, it helps to know when refinishing makes sense and when it doesn't.
How to tell if your built in cabinets are good candidates for refinishing
Built-ins are often worth saving because they were made for that exact wall, niche, or corner. In kitchens, bathrooms, offices, mudrooms, and living rooms, that custom fit is hard to replace cheaply.
A good candidate has strong cabinet boxes, doors that still sit straight, and a layout you still like. Solid wood, MDF in good shape, and quality veneer can all be refinished if the surface is stable. If drawers slide well and hinges still hold, that's another good sign.
Replacement makes more sense when the problems go beyond the finish. Major water damage, swollen panels, broken cabinet boxes, or a room layout that never worked can turn a cosmetic project into a money pit.
Signs the cabinets only need a finish update, not a full replacement
Many cabinets look worse than they are. Faded color, a yellowed clear coat, light scratches, small chips, and old hardware often point to a surface problem, not a structural one.
If the stain feels dated or the paint has lost its smooth look, refinishing built in cabinets is often the smart move. The same goes for oak cabinets with heavy grain that you want to modernize, or dark built-ins that make the room feel smaller than it is.
Cosmetic wear usually means the cabinet still has years of life left.
When hidden damage can change the plan
Some trouble hides under the surface. Grease buildup near a range, water damage by sinks, loose veneer, bubbling, and swelling can all affect how well a new finish sticks.
That doesn't always mean the cabinets are beyond repair. However, deep structural damage changes the process and the budget. A close inspection from Dr. Cabinet can help you avoid paying for the wrong fix first.
The right way to refinish built in cabinets for a smooth, lasting finish
Good results start long before the first coat goes on. Most finish failures happen because someone rushed prep, skipped cleaning, or sanded veneer too hard.
Dr. Cabinet follows the same basics that still matter most in 2026: low-VOC products, careful surface prep, thin even coats, and smart sheen choices. When done well, refinishing built in cabinets can look clean, current, and durable for years.
Prep work that makes or breaks the final result
Start by removing doors, drawers, knobs, and pulls. Label every part, because reassembly gets messy fast when everything looks alike.
Then clean harder than you think you need to. Kitchen built-ins collect wax, grease, and hand oils. A strong degreaser helps the primer bond instead of sliding over residue.
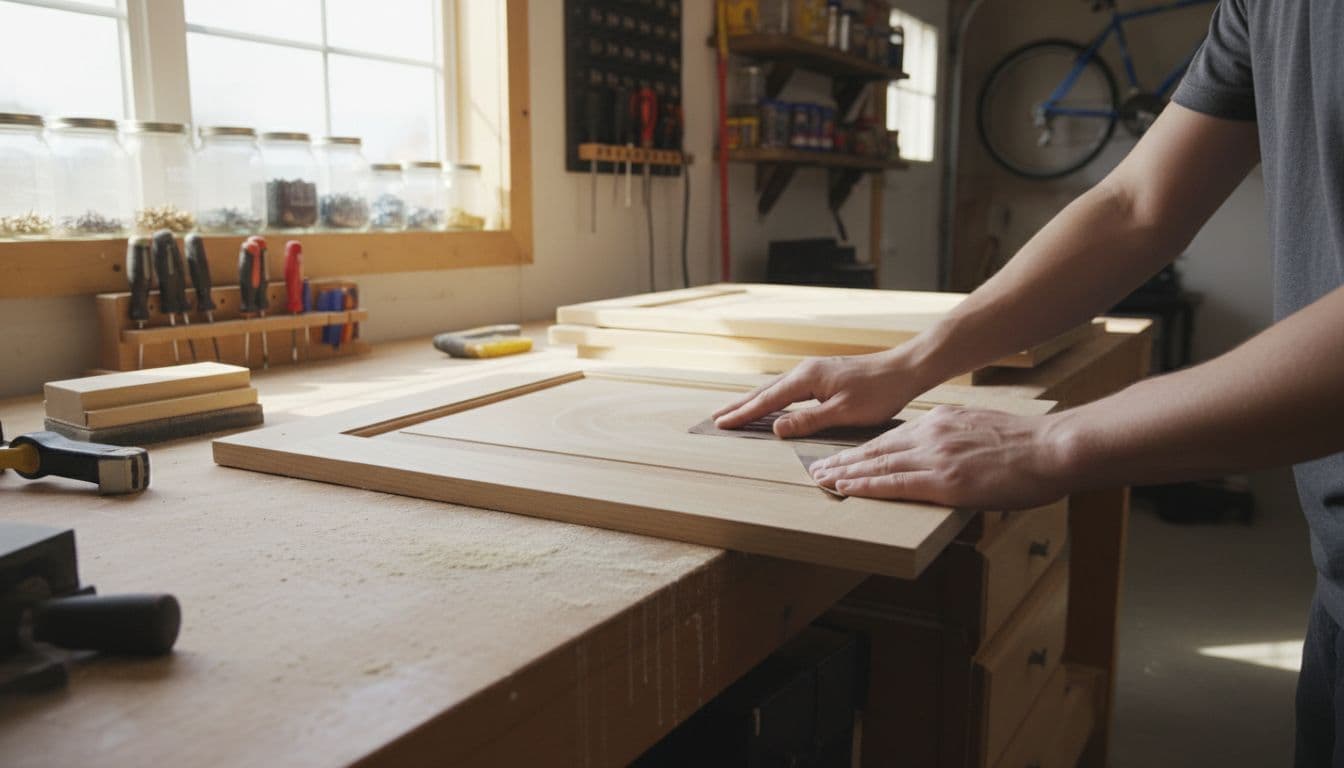
After cleaning, sand lightly or use a deglosser if the surface is thin veneer. Fill old hardware holes if you're changing pulls. If you want a smooth painted finish on oak, grain filler makes a big difference. Finish the prep with a high-adhesion primer.
Peeling almost always starts here. Skip prep, and the topcoat may look fine for a month, then fail around edges and handles.
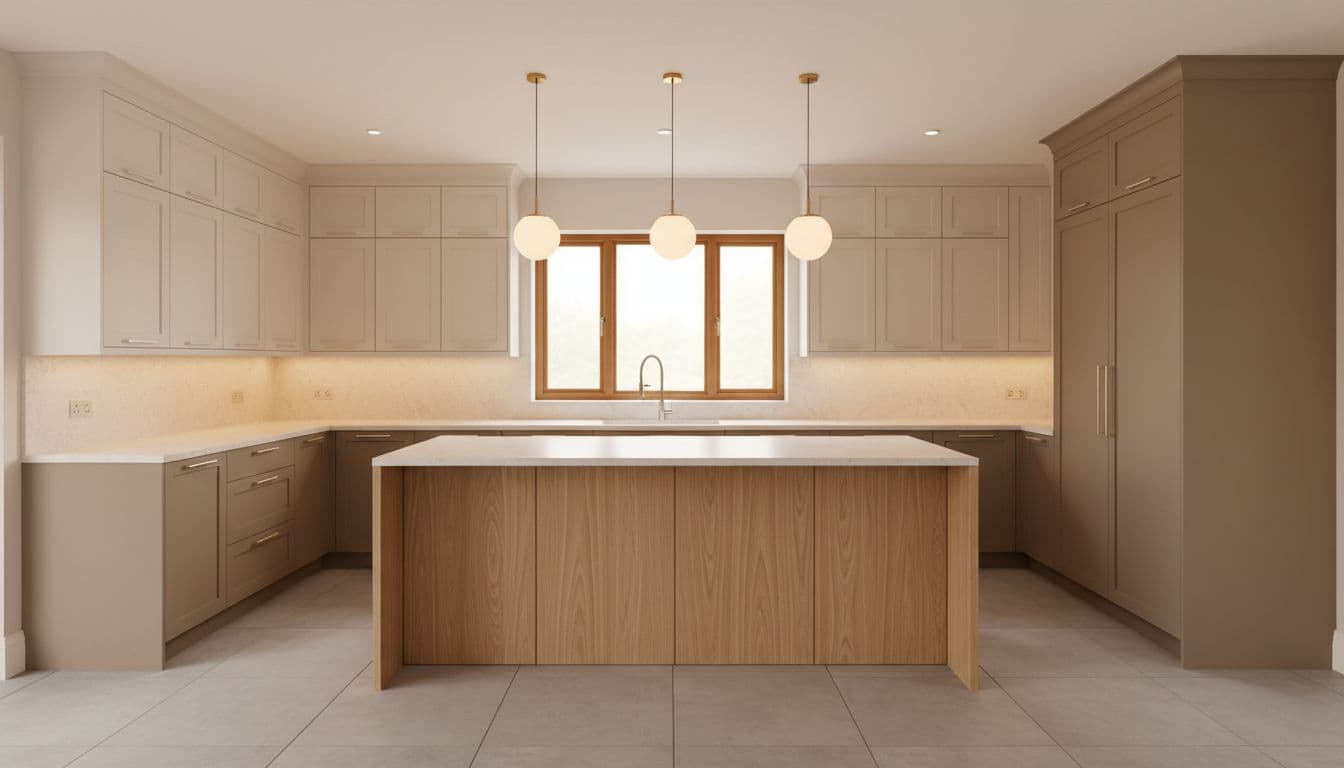
Choosing paint, stain, and sheen for the look you want
Paint gives you the biggest visual change. Stain keeps more of the wood character. Both can work well, but the right choice depends on what the cabinets are made of and how much grain you want to see.
In 2026, many homeowners are moving toward soft greens, warm taupes, creamy off-whites, and earthy neutrals. Natural wood looks are also strong, especially tones without the old orange cast. Satin and pearl sheens are popular because they hide fingerprints better than high gloss and still clean up well.
For bathrooms, mold-resistant paint is a smart extra layer of protection. For wood cabinets, gel stain is still a good lower-waste option because it stays put on vertical surfaces and helps control drips.
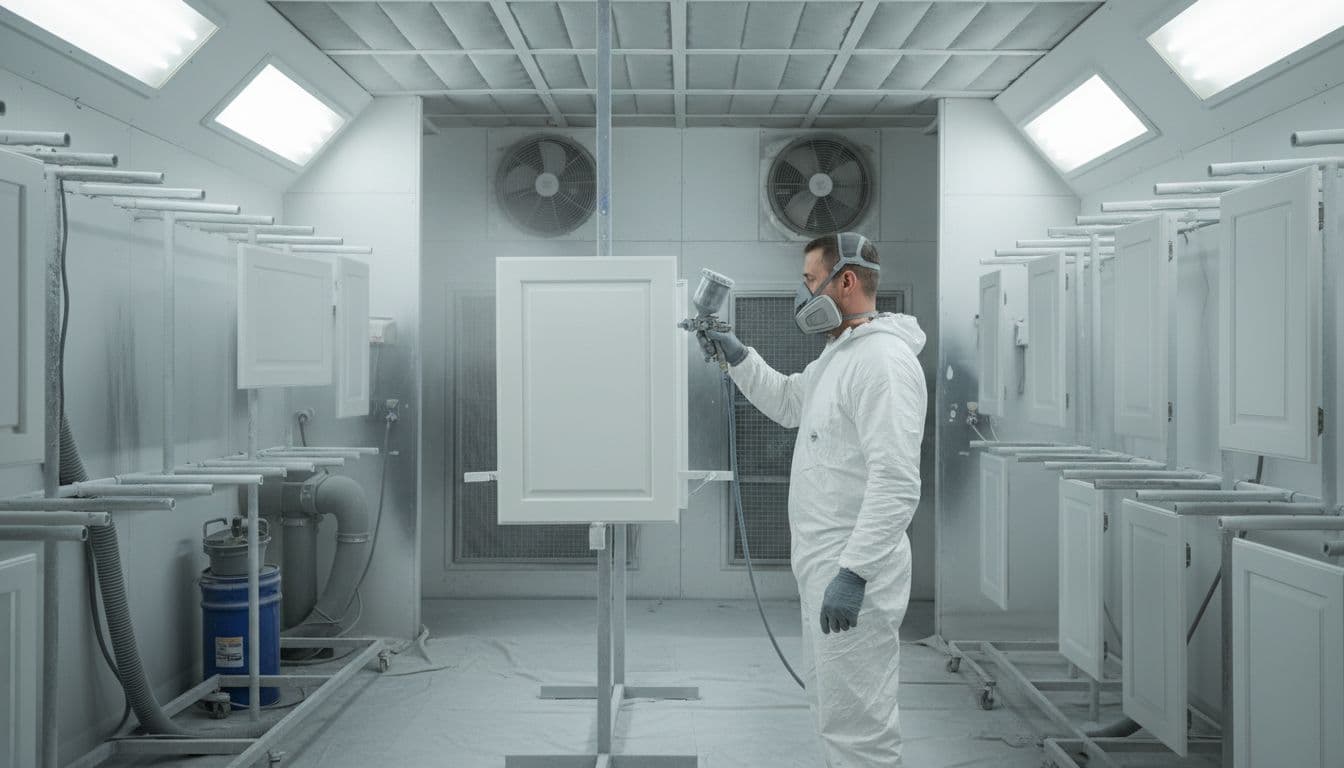
Reassembly, curing time, and the finishing touches people notice
Apply thin coats and let each one dry fully. Heavy coats sag, trap dust, and chip sooner.
When the finish is ready, reinstall hardware with care so doors line up evenly. Caulk where the cabinet meets the wall if you want that clean built-in look. Then be patient. Some modern cabinet coatings need up to 30 days to fully harden, so gentle use matters even after the surface feels dry.
DIY or hire a pro for refinishing built in cabinets
This choice often comes down to time, tools, and how perfect you want the finish to look. Refinishing built in cabinets can be a solid DIY project, but only when the scope matches your skill.
The cost gap helps explain the appeal. Here is a simple side-by-side view for a typical kitchen-sized project.
| Option | Typical 2026 cost |
|---|---|
| DIY materials | $500 to $2,000 |
| Professional refinishing | $3,000 to $10,000+ |
DIY saves money, but labor, drying space, and mistakes still cost something. Dr. Cabinet can help homeowners decide whether a project is worth tackling or better left to a shop crew.
When a DIY approach can work well
DIY often works for smaller built-ins, light wear, and simple paint color changes. A home office wall unit or mudroom bench cabinet is usually easier than a grease-heavy kitchen.
You'll still need decent tools, room to work, and patience with prep and cure time. If you rush, dust, drips, and hinge misalignment show up fast.
Why many homeowners call a cabinet refinishing specialist
Large kitchen runs, thin veneers, and slick factory finishes are harder than they look. A pro can spray doors for a smoother finish, prep greasy surfaces the right way, and avoid sanding through veneer.
Many homeowners also want upgrades while the cabinets are apart. Dr. Cabinet can add new hardware, improve drawer function, and spot repair issues before they spread. That extra detail is why professional work often lasts longer and looks sharper.
Built-ins are part of the room, so keeping them usually makes more sense than starting over. When the boxes are sound, refinishing built in cabinets can save money, refresh the space, and extend the life of cabinetry you already own.
The best choice depends on condition, finish goals, and how much time you can give the project. If you want a clear plan and a durable result, Dr. Cabinet can help with a quote or consultation.


Comments
Post a Comment