Water Damage on Kitchen Cabinets: Repair, Drying, and Prevention
A swollen cabinet edge, brown stain, or musty smell can turn an ordinary kitchen cleanup into a stressful discovery. Water damage on kitchen cabinets need quick attention because moisture can spread into cabinet boxes, flooring, and nearby walls.
Fast action can limit mold growth, protect stored items, and prevent a small leak from becoming a full cabinet replacement. Dr. Cabinet helps homeowners and commercial property owners inspect damage, restore usable cabinetry, and plan practical repairs.
Start by finding where the water came from, then dry every affected area before deciding what needs repair.

How Water Damage on Kitchen Cabinets Starts and What It Looks Like
Most cabinet damage begins where water is easy to miss. A loose supply-line fitting, worn P-trap washer, dripping garbage disposal, or failing dishwasher hose can release small amounts of water for weeks. By the time you notice a stain, the cabinet floor may already be weak.
Water can also enter through gaps around the sink rim or countertop seam. Overflows, uncleaned spills, refrigerator supply-line leaks, and condensation on cold pipes create similar problems. High kitchen humidity can make matters worse, especially in poorly ventilated rooms.
Look closely for swollen bottom edges, peeling laminate, bubbling paint, warped shelves, and stains around the sink base. Particleboard often expands first at exposed edges and may feel puffy or soft. Doors may rub, drawers may stick, and toe-kicks can loosen as the cabinet box shifts.
A dry cabinet face doesn't prove the interior is safe. Water can run beneath a countertop, behind the cabinet back, or under the cabinet base before it becomes visible.
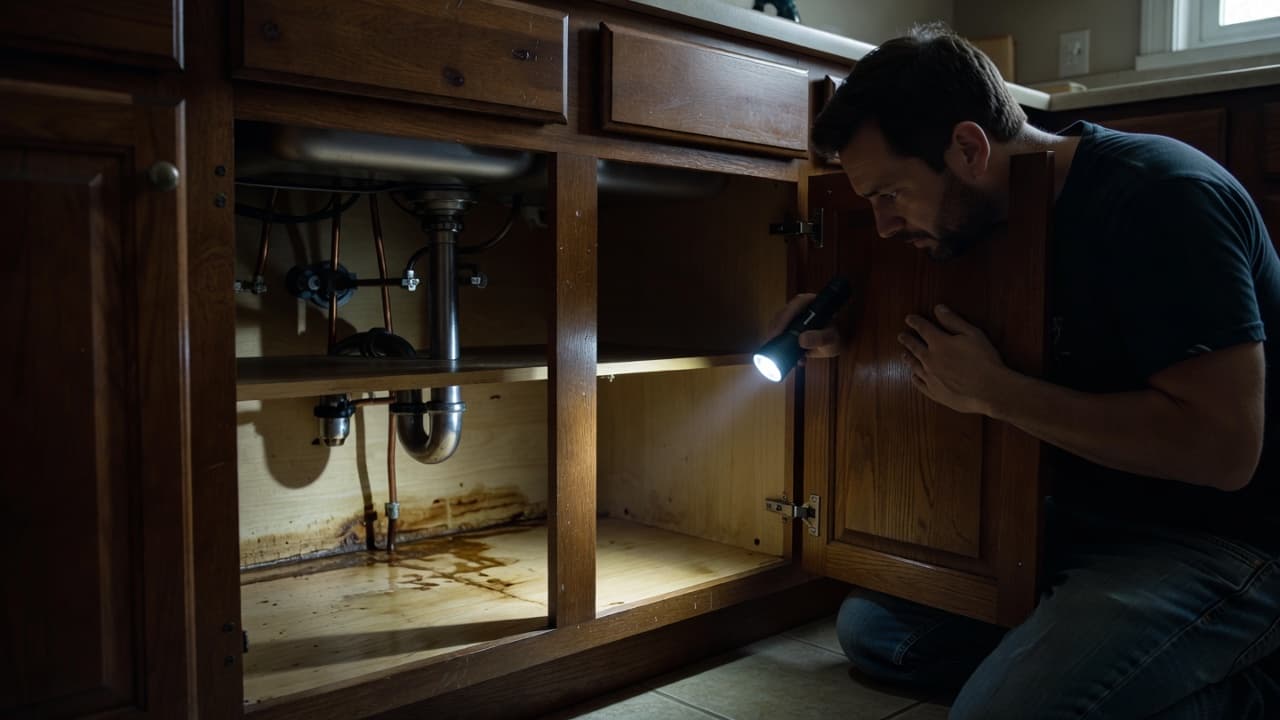 ### Check These Hidden Areas Before the Damage Gets Worse
Empty the cabinet under the sink and inspect its floor, corners, back wall, and plumbing cutouts. Then check shelf supports, hinge areas, the toe-kick, and the seams where panels meet. A flashlight helps reveal staining lines, mildew, or peeling material in dark corners.
Press a dry paper towel around pipe connections and beneath the disposal. If it comes away damp after you run water, you may have found an active leak. A moisture meter can also identify damp wood behind a surface that looks normal.
Standing water near an outlet, dishwasher connection, or other electrical component requires caution. Shut off power safely if possible, and call a qualified professional.
Common Causes of Water Damaged Kitchen Cabinets
Sudden leaks often come from a burst hose, overflowing sink, dishwasher failure, or refrigerator line. These events can soak the cabinet base within minutes and may reach the flooring underneath.
Slow seepage causes more hidden damage because it often goes unnoticed. Loose fittings, rusted pipes, worn washers, failing drain seals, cracked disposal housings, poor caulking, and pipe condensation are common culprits. Even a small daily drip can soften particleboard until it breaks apart.
Fix the water source before repairing a cabinet. New paint, filler, or laminate won't hold up if moisture continues to enter the same area.
What to Do Immediately After Finding Water Damage on Kitchen Cabinets
When you find water damaged kitchen cabinets, stop the water first. Turn off the sink shutoff valves if the leak is under the sink. For an appliance leak, stop the appliance and close its water supply if you can do so safely.
Remove dishes, cleaners, food, and shelf liners. Discard wet cardboard boxes and food packaging because they trap moisture and can develop mildew. Next, take out drawers and cabinet doors if removal is safe and simple.
Use towels or a wet-dry vacuum to remove standing water. Wear gloves, eye protection, and a mask during cleanup, especially if the area smells musty. Open nearby windows, run fans, and use a dehumidifier for at least 24 hours. Heavier saturation can take 48 to 72 hours to dry.
Don't apply caulk, paint, or a new finish over damp materials. Sealing in moisture can worsen odor, swelling, and mold growth.
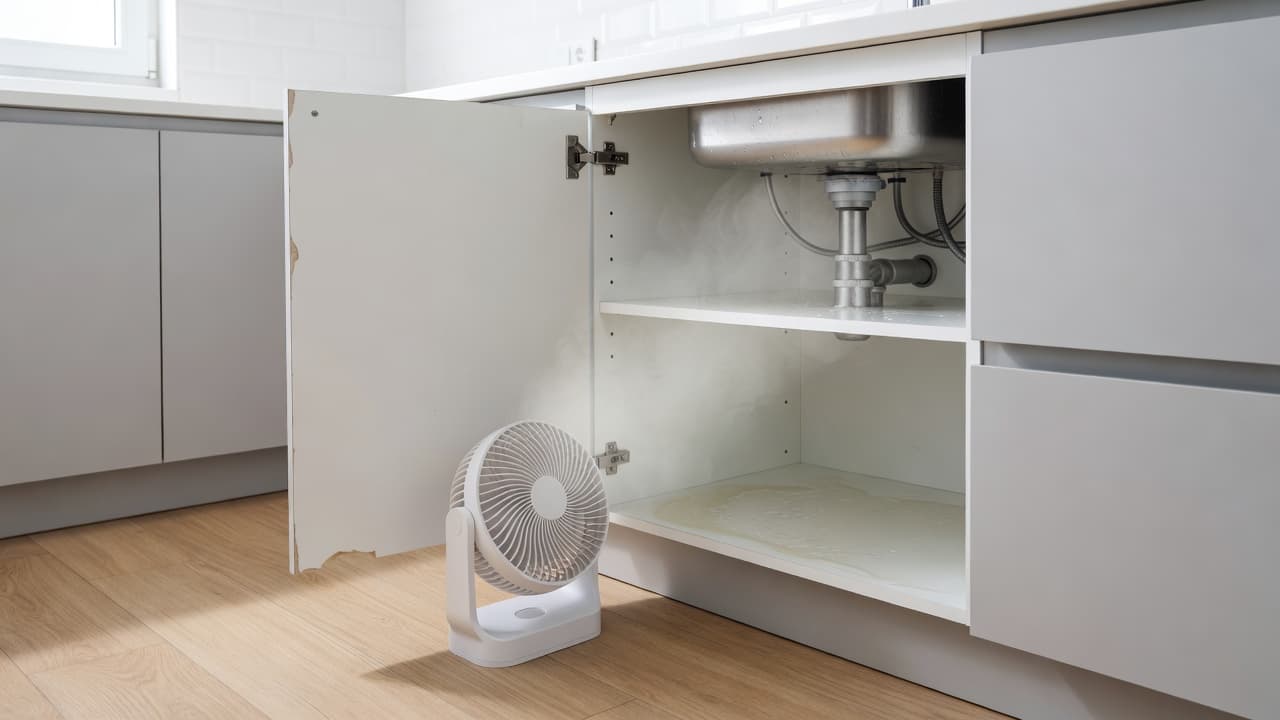 ### Dry the Cabinet Box, Flooring, and Hidden Spaces
Drying the visible shelf is only the first step. Check the underside of the sink, cabinet seams, toe-kick, wall behind the box, and the floor below the cabinet. Water often settles in these enclosed spaces.
Remove a toe-kick only if you can do it without damaging the cabinet or nearby flooring. That opening may reveal trapped water or allow better airflow. Professional air movers may be needed when water has reached a deep cavity.
Monitor the area after drying. Continued dampness, swelling, soft spots, or a returning odor can mean water remains behind the cabinet. Professional moisture testing is a wise choice when flooring, insulation, walls, or electrical components were exposed.
When Mold, Soft Wood, or Structural Damage Needs Professional Help
Mushy particleboard, severe warping, widespread visible mold, and shelves that no longer support weight are poor DIY projects. Cabinet boxes can lose their shape after long exposure, which affects doors, countertops, and adjoining units.
Sewage-contaminated water also requires professional cleanup. Avoid pulling apart fixed cabinet panels when you don't know what is behind them. Plumbing, wiring, and hidden mold may sit inside the wall or floor cavity.
Dr. Cabinet can inspect the affected area and provide a repair plan that fits the cabinet's condition. A careful assessment helps separate repairable surfaces from materials that need replacement.
Can Water Damaged Kitchen Cabinets Be Repaired or Should They Be Replaced?
Many water damaged kitchen cabinets can be restored when the cabinet frame remains solid and dry. Damage limited to a door, drawer front, shelf, veneer edge, or small stained section is often repairable.
Replacement becomes more likely when particleboard has swollen, softened, and lost its shape. A cabinet box that sags, crumbles around fasteners, or can't support a countertop needs more than a cosmetic repair. Widespread mold can also make replacement the safer choice.
Partial replacement can reduce cost and disruption. A damaged sink base, shelf, toe-kick, or door may be replaced without tearing out the entire kitchen. Matching the finish and hardware takes care, but it preserves the look of the surrounding cabinets. Any help and click here link.
Practical Repairs for Swelling, Peeling, and Surface Stains
First, let the area dry fully and confirm the leak is fixed. Remove loose laminate, peeling finish, or weak filler with care. Fine-grit sandpaper can smooth rough edges before repair.
Small cracks and shallow dents may accept wood filler. Lifting veneer or laminate can sometimes be glued and clamped after the substrate is dry. However, swollen particleboard rarely returns to its original strength, so weak sections often need replacement with properly sealed material.
Finish repaired surfaces with a kitchen-rated coating. Polyurethane, varnish, and lacquer may work depending on the existing cabinet material and finish. Follow the product's ventilation, curing, and drying directions before reinstalling doors or storing items.
DIY Repairs Versus Hiring a Cabinet Specialist
Drying a small spill, replacing a removable shelf, or touching up a minor finish flaw may be manageable at home. Cabinet-box repairs are more involved because they can require plumbing access, structural alignment, finish matching, and countertop protection.
For water damaged kitchen cabinets with warped panels or hidden moisture, a cabinet specialist can repair, refinish, reface, or partially replace the affected parts. That approach may preserve usable cabinetry instead of forcing a full kitchen renovation.
Dr. Cabinet works with residential and commercial spaces, including apartments, restaurants, offices, retail locations, and healthcare facilities. The team can also repair doors, drawers, hardware, and damaged finishes as part of a larger cabinet restoration project.
How to Prevent Future Water Damage on Kitchen Cabinets
Prevention starts with regular checks. Look under the sink and behind appliances every few months, especially after plumbing work or appliance installation. Check for drips, water spots, rust, and damp cabinet floors.
Keep silicone caulk in good condition around the sink and countertop. Replace worn appliance hoses and seals before they fail. A waterproof liner in the sink base can catch small drips and give you an early warning.
Wipe spills quickly, keep cabinet interiors dry, and run an exhaust fan when steam builds up. Dr. Cabinet also offers upgrades such as durable finishes, hardware repairs, and storage improvements that can make cabinets easier to maintain.
Simple Leak Checks for Sinks, Dishwashers, and Refrigerators
Place a dry paper towel beneath sink connections, the dishwasher supply line, and the refrigerator water line. Run the faucet, disposal, dishwasher, or ice maker, then check the towel and cabinet floor for damp spots.
Inspect after a full dishwasher cycle because some leaks appear only during draining. Don't overtighten fittings or replace plumbing parts beyond your skill level. Call a licensed plumber if the source remains unclear or the leak continues.
Make the Cabinet Base More Resistant to Future Spills
Sealed seams, protected plumbing openings, sound caulking, and moisture-resistant finishes reduce the chance of water getting into cabinet materials. A fitted waterproof sink-base liner adds another layer of protection beneath pipes and cleaning supplies.
These measures reduce risk, but cabinets aren't completely waterproof. Dr. Cabinet can add protective details during cabinet repairs, refacing work, or a kitchen remodel, when access to the cabinet base is easier.
Protect Your Cabinets Before a Small Leak Spreads
The right response is straightforward: stop the source, dry every affected area, and inspect for hidden damage before making repairs. Many water damaged kitchen cabinets can be restored when the cabinet box remains strong and moisture hasn't spread too far.
Serious mold, soft particleboard, or structural movement needs a professional assessment. Dr. Cabinet can help you determine what can be repaired, refinished, or replaced without unnecessary disruption.
For a free estimate, call 201-212-5477 or email infodrcabinet@gmail.com.


Comments
Post a Comment