Wood Veneer Repair: How to Fix Damage Without Replacing the Whole Piece
Veneer damage often looks worse than it is. A peeling edge, small bubble, scratch, or chip can often be repaired without replacing an entire cabinet door or furniture panel.
Successful wood veneer repair depends on careful cleaning, the right adhesive, controlled pressure, and a finish that blends with the original surface. Dr. Cabinet helps homeowners and businesses restore cabinets, doors, furniture, and other wood surfaces with damage that ranges from minor touch-ups to larger veneer patches.
Start by identifying what has failed before reaching for glue, filler, or a utility knife.
Wood Veneer Repair: Identify the Damage Before You Start
Inspect the veneer in bright light and press gently around the damaged area. Look for loose edges, hollow-sounding bubbles, surface scratches, chipped corners, and sections where the veneer is completely gone.
Keep intact veneer whenever possible. Isolated lifting and small bubbles usually need adhesive and even pressure. Missing veneer or badly cracked sections often need a patch. As a practical rule, consider replacement of the panel when more than half of its visible veneer is gone or damaged beyond a clean repair.
For difficult damage on a prominent door, wood veneer repair services from Dr. Cabinet can help avoid a mismatched finish or a repair that fails again.
Common veneer problems and the best fix for each one
Peeling edges and lifted sections usually respond well to reglueing. Lift the veneer only enough to clean beneath it, then bond it back down before considering a patch.
Bubbles and blisters need adhesive under the veneer, followed by flat, even pressure. A shallow scratch may only need touch-up color. Use wax filler for a tiny hole, and use matched wood filler for a small chip that has lost material.
Chipped corners can sometimes be rebuilt with filler and color. However, a missing section with an obvious grain pattern usually calls for a fitted veneer patch. Cutting away sound veneer creates a larger finishing problem.
Gather the right tools and materials for a clean repair
Set up everything before opening the adhesive. Useful supplies include:
- A sharp utility knife and straight edge for controlled trimming and patch cuts.
- A plastic scraper or flexible putty knife for removing old glue and spreading new adhesive.
- Wood glue or contact cement, selected for the veneer, substrate, and repair method.
- Wax paper, cardboard, clamps, heavy weights, and a flat wood block for even pressure.
- Fine sandpaper, ideally 320 to 400 grit, plus stain, furniture markers, wax filler, and a protective finish.
Use a new utility blade carefully. A dull blade can tear fragile veneer, while a rushed cut can score the panel beneath it.
How to Repair Peeling Veneer, Bubbles, and Small Surface Damage
Small repairs reward patience. Veneer is thin, so forcing it upward can turn a loose edge into a cracked or missing section. Clean away dust and failed adhesive first, then use only enough glue to coat both bonding surfaces where the adhesive label calls for it.
Allow the repair to cure for 6 to 24 hours before sanding or finishing, based on the adhesive instructions and the size of the repair. Keep knives pointed away from your body, protect the work from clamp dents, and ventilate the area when using contact cement or finish products.
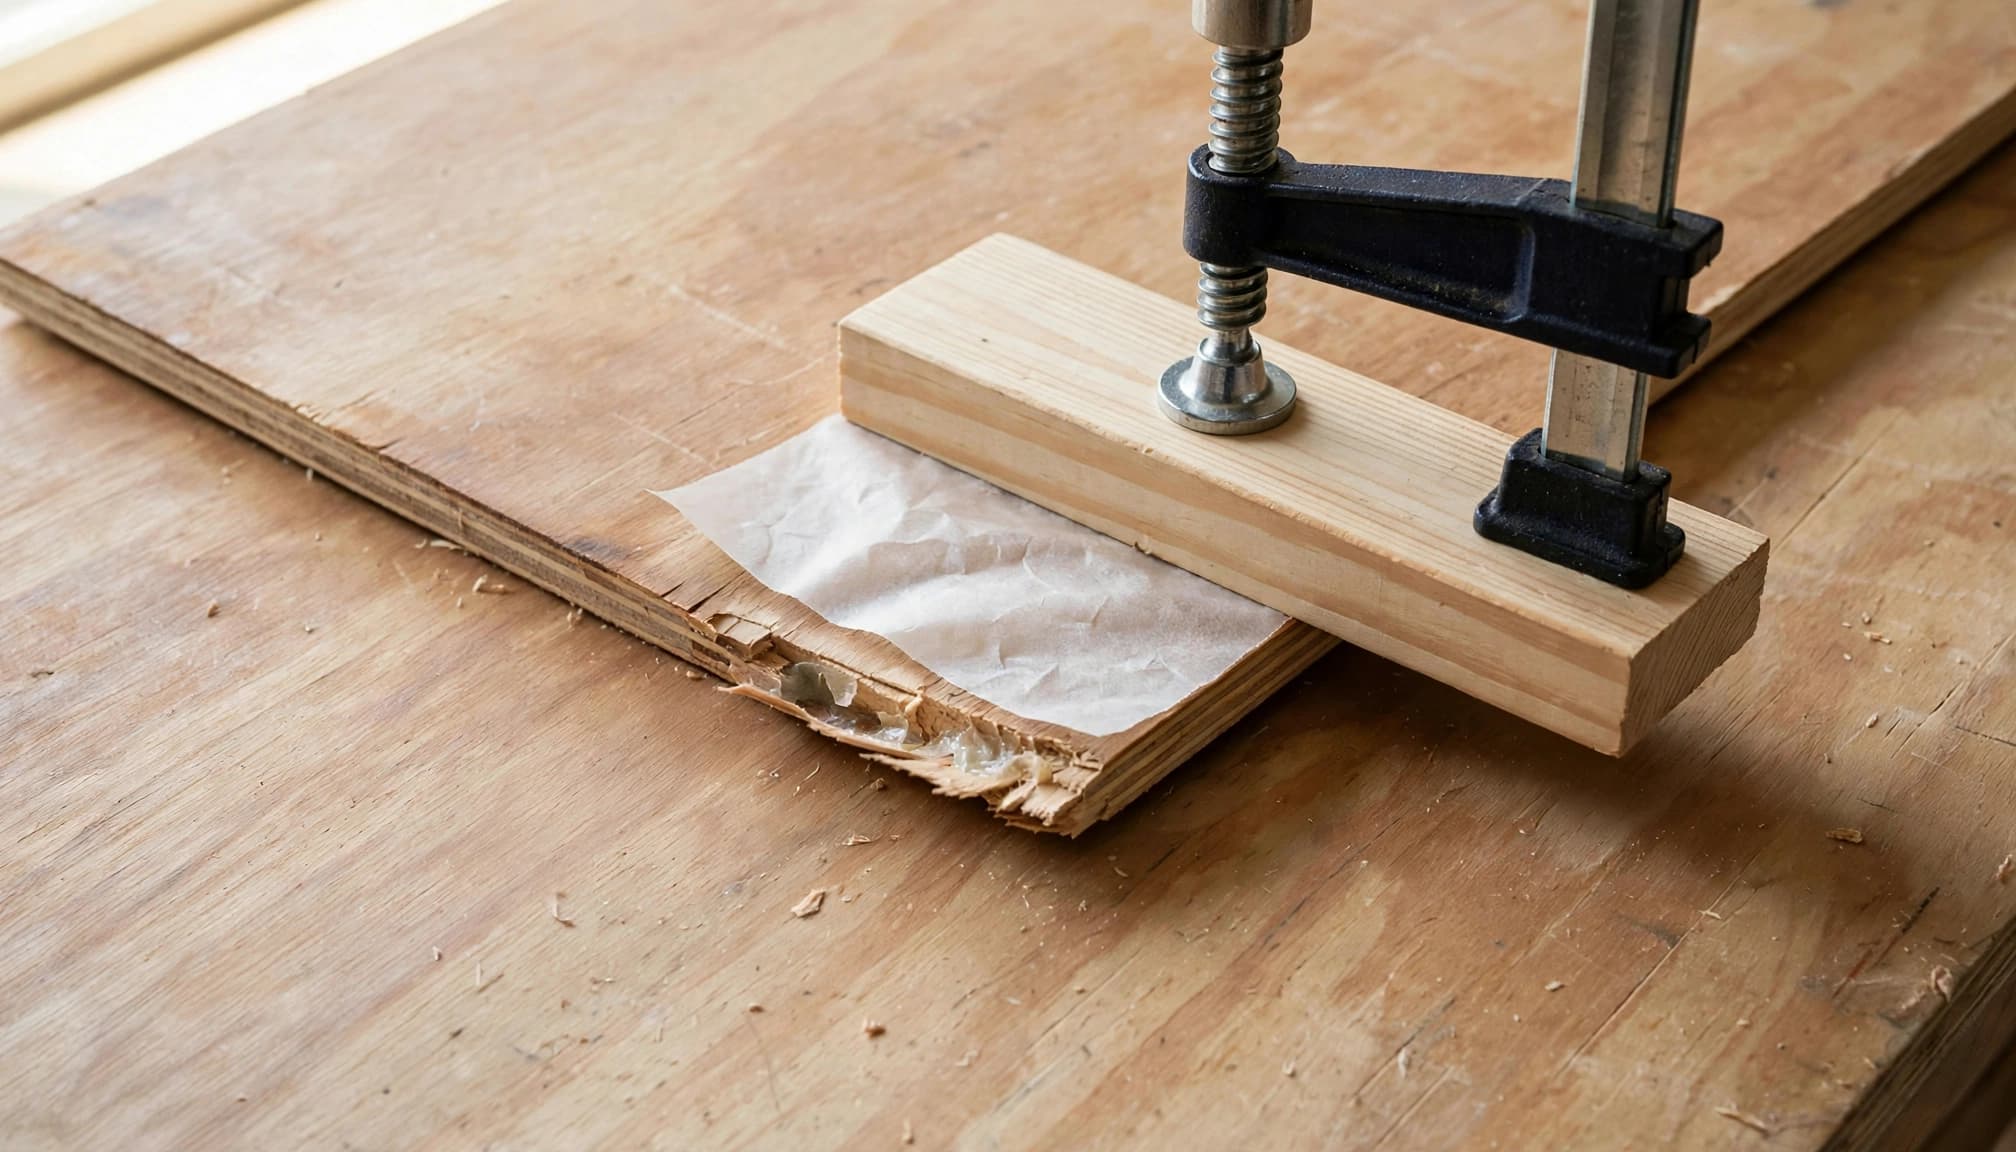
Reglue loose or peeling veneer without making the damage worse
Lift the loose section only as far as necessary. Then scrape off brittle adhesive with a plastic scraper or flexible putty knife, and remove dust with a clean, dry cloth.
Spread a thin, even coat of adhesive beneath the veneer. Press it flat, wipe away squeeze-out promptly, and cover the repair with wax paper. Place a flat wood block over the area before clamping, or use a heavy weight where a clamp cannot reach.
The block spreads pressure across the surface and helps prevent dents. Check that the veneer stays aligned before leaving it to cure.
Flatten veneer bubbles with a small cut and even pressure
A small bubble may need a careful slit parallel to the grain. Keep the cut as short as possible, then use a flexible tool to work adhesive beneath the veneer.
Cover the area with wax paper, add a flat block, and clamp it gently until cured. Excessive clamp pressure can leave a mark or force adhesive out before it bonds.
Heat can sometimes soften old adhesive under a blister. Use it briefly through a protective barrier, such as a cloth, because direct heat can scorch the veneer or damage its finish.
Blend scratches, chips, and tiny holes with filler or touch-up color
A patch isn't necessary for every flaw. Furniture markers can disguise light scratches, while a wax stick works well for narrow nicks and tiny holes. Use wood filler only where material is missing.
Apply filler sparingly and keep it inside the damaged area. Once it dries, level it with 320 to 400 grit sandpaper using a light touch. Aggressive sanding can cut through veneer in seconds.
Match both the color and the sheen. A repair may have the right stain color but still stand out if the surrounding surface has a satin, matte, or glossy finish.
How to Patch Missing Veneer and Match the Existing Wood
Patch work is the right choice when veneer is missing, cracked beyond reglueing, or too damaged to blend with filler. Square or shape the opening into a clean outline, then choose replacement veneer with grain that runs in the same direction.
Cut the patch slightly oversized, test-fit it, and trim gradually until it sits cleanly in the opening. Glue it in place, protect it with wax paper, and hold it flat with a block and clamp.
Oval and diamond-shaped patches can hide seams better than square cuts because their edges don't create long, straight lines across the grain.
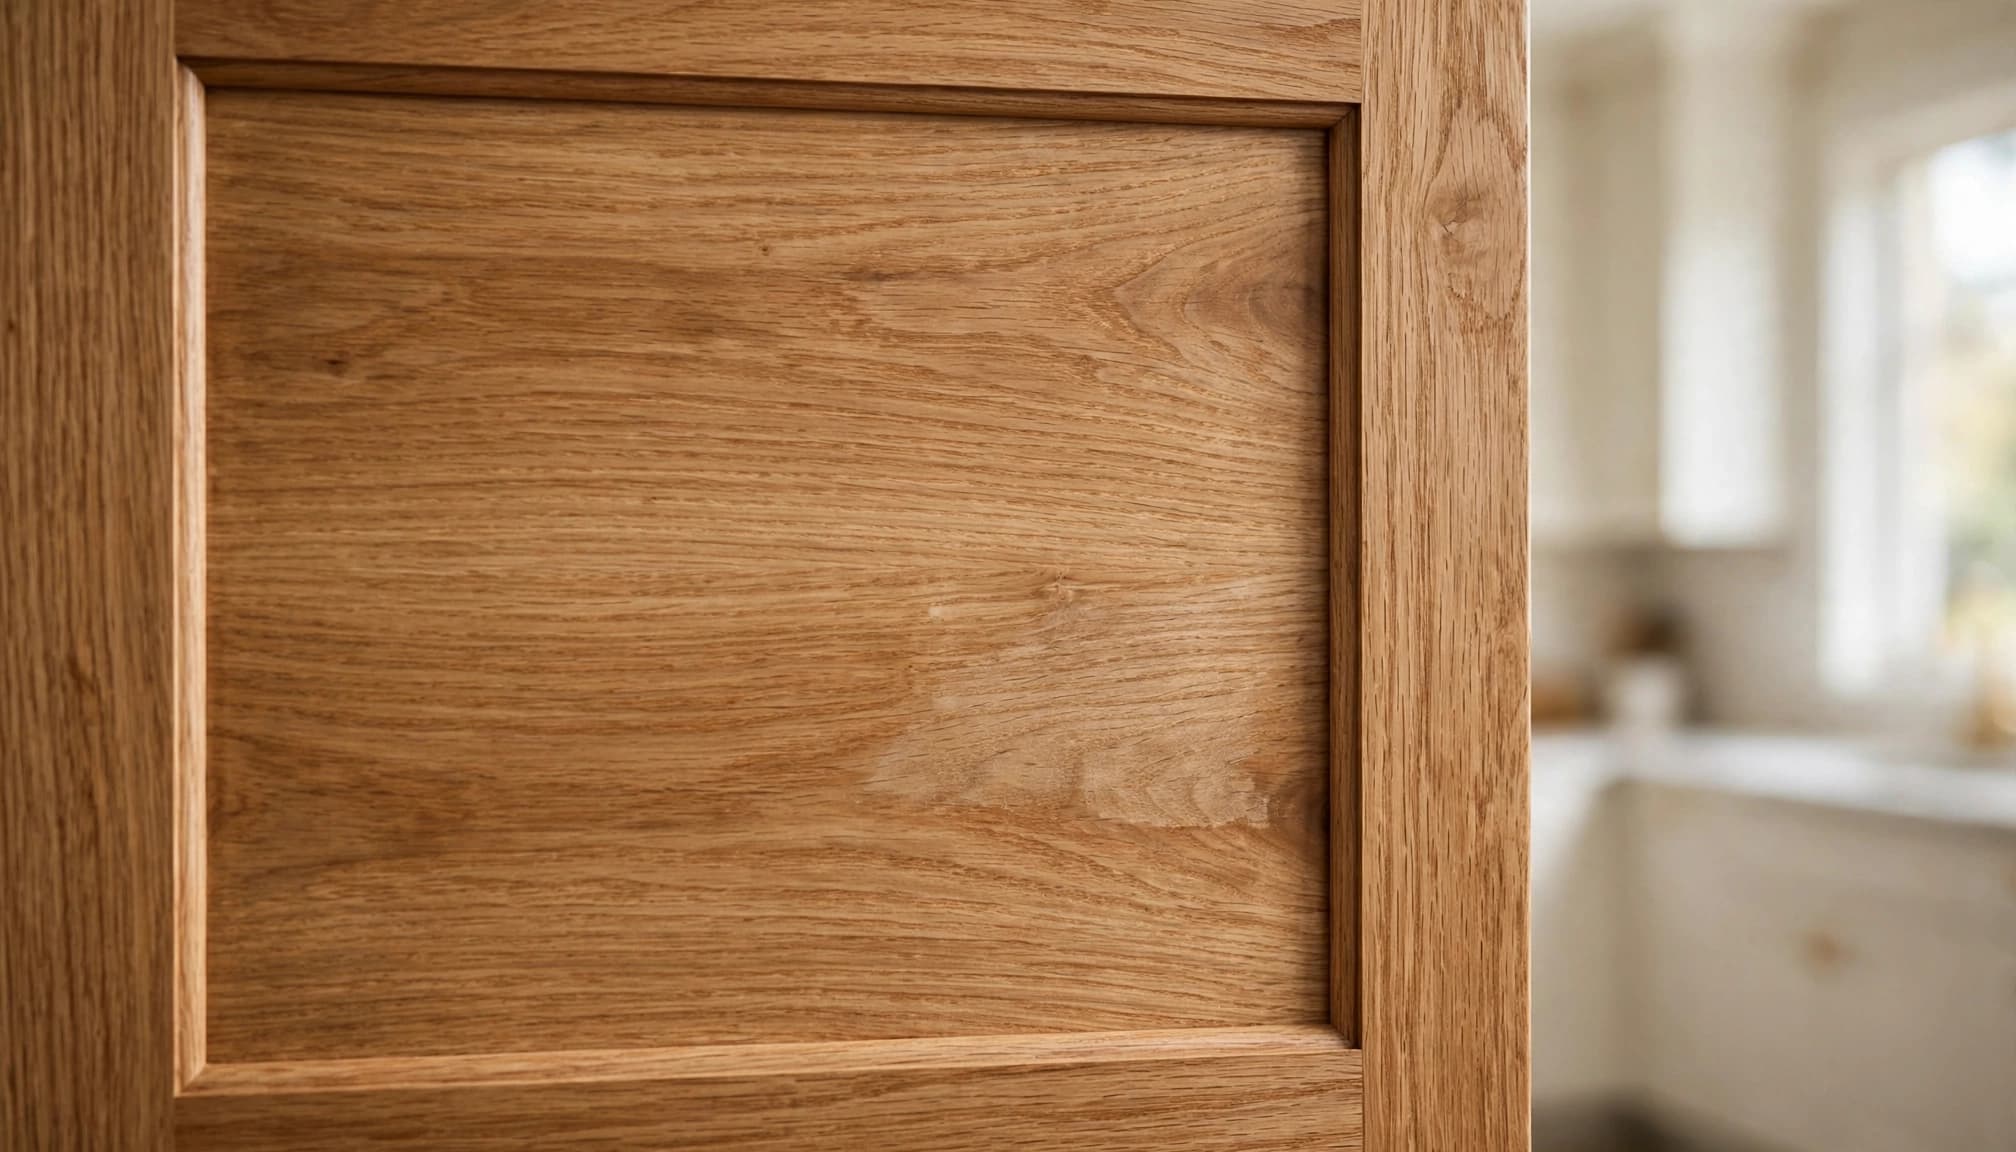
Choose a patch that matches grain, color, and thickness
A convincing patch matches more than color. Compare wood species, grain direction, figure, veneer thickness, and the existing finish. Oak, maple, walnut, and birch can all take stain differently, even when their raw color looks similar.
Test stain on a scrap piece of the replacement veneer before applying it to the repair. Also compare the patch under the same room lighting where the cabinet or furniture will sit. Daylight, warm bulbs, and cool LEDs can reveal different color differences.
Lightly sand the cured patch, blend color in thin layers, and add a compatible protective topcoat.
Know when patching is better than replacing the entire panel
Repair is often the best value when damage is isolated and the substrate remains solid. A partial patch preserves more of the original panel and usually requires less finishing work than replacing all veneer.
Full veneer replacement may make more sense when lifting appears across most of the panel. Water damage, warped backing, crumbling particleboard, or widespread adhesive failure can also make a small patch short-lived.
Dr. Cabinet can assess visible cabinet doors, commercial fixtures, furniture, and larger patch jobs where grain matching matters. The right choice depends on appearance, labor, material availability, and the underlying condition of the panel.
When Should You Hire Dr. Cabinet for Veneer Repair?
Professional help is the safer choice for large missing areas, brittle or historic veneer, curved surfaces, repeated peeling, and doors that sit at eye level every day. These repairs require controlled cuts, stable clamping, color matching, and finish blending.
Repair cost depends on the size of the damage, patch material, old adhesive cleanup, clamping time, sanding, staining, finish work, and number of panels. Dr. Cabinet can provide a free estimate for residential or commercial repairs. Call 201-212-5477 or email infodrcabinet@gmail.com to discuss the damage.
What a professional repair visit should include
A good repair begins with an inspection of the veneer and the substrate below it. The technician should identify the cause, recommend a reglue or patch approach, select a compatible veneer, complete the repair, and blend the finish.
Dr. Cabinet works with homes, offices, restaurants, retail spaces, healthcare facilities, hotels, and other commercial properties. An inspection also helps set realistic expectations before anyone quotes a price or promises a finish match.
How to prevent peeling, bubbling, and repeat damage
Wipe spills quickly and keep standing water away from seams, door edges, and sink-base cabinets. Avoid harsh cleaners, place mats under hot appliances, and use coasters on veneered furniture.
Repeated lifting often points to moisture, heat, impact, or failed adhesive beneath the surface. Address a loose edge early, because it is easier to reglue than a broken section.
Dr. Cabinet can also help with broader cabinet restoration or refinishing when the same damage keeps returning.
Key Takeaways for a Strong Veneer Repair
Loose veneer needs cleaning, adhesive, and flat pressure. Scratches and small chips often need only touch-up color or filler, while missing sections require a carefully matched patch.
A repair can fail even with good glue if moisture, failed backing, or uneven clamping caused the original damage.
Finish work matters as much as the repair itself. Light sanding, tested stain, and matching sheen help the repaired area disappear into the surrounding wood.
Frequently Asked Questions
Can I repair veneer without removing the cabinet door?
Many small repairs can be completed in place when the damaged area is easy to reach and you can clamp it safely. Removing the door gives you a flatter work surface and better access when the repair is near an edge, hinge, or corner.
What glue works best for loose wood veneer?
Wood glue often works well for loose veneer because it allows adjustment before clamping. Contact cement can suit certain patch applications, but it bonds on contact and leaves less room for repositioning. Follow the product label for application and cure time.
Can water-damaged veneer be repaired?
Minor lifting can be repairable after the veneer and substrate dry completely. However, swelling, mold, crumbling particleboard, and widespread separation often require panel replacement or a professional assessment.
How long does a veneer repair last?
Durability depends on clean surfaces, full adhesive coverage, even pressure, proper curing, moisture control, and finish protection. Repeated exposure to water or direct heat can cause another failure, even after a careful repair.
Is it cheaper to repair veneer or replace the cabinet?
Repair is often less costly for localized damage because it preserves the existing door or panel. The final decision depends on the damage size, location, finish, and condition of the substrate. A professional estimate can compare repair, refinishing, refacing, and replacement.
How do I get help with a difficult veneer repair?
Large patches, prominent grain matching, historic furniture, and commercial cabinetry benefit from professional assessment. Contact the repair team at 201-212-5477 or infodrcabinet@gmail.com for a free estimate and recommendations based on the condition of the piece.
A Better Finish Starts With the Right Repair
Peeling edges, bubbles, scratches, chips, and missing veneer each call for a different response. Careful preparation, controlled pressure, and finish matching give the repair its best chance to hold and blend in.
For help with wood veneer repair, cabinet restoration, or related services, contact Dr. Cabinet at 201-212-5477 or infodrcabinet@gmail.com.


Comments
Post a Comment